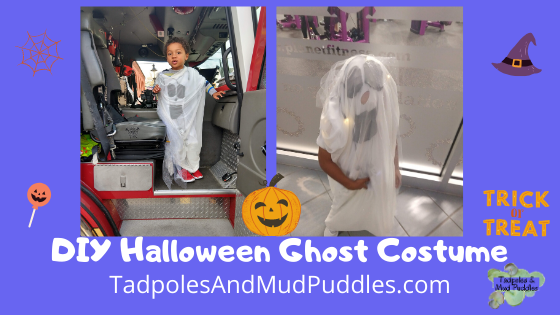
Aiden decided that he wants to be a ghost for Halloween this year. And in the spirit of trying to save some money, we’re going DIY for his Halloween Ghost Costume with an oversized white T-shirt, 2 yards of white meshy fabric, velcro dots, battery-powered lights, and black and white mesh.

I’m excited to see how it turns out but at the same time, I’m not using a pattern. I’m making it up as I go along.
Making a DIY Halloween Ghost Costume

I got my oversized t-shirt from Walmart. It’s a 3x which I honestly thought should have been long enough in itself for a ghost costume but my boy is tall. You can use an old t-shirt or get a new one. This is my base. The base is where I sewed everything to.

I first sewed the neck of the T-shirt shut. In retrospect, I should have left it open. We tried to over the top of his head like a sheet and he truly hates it. He was way too hot for inside truck or treating that we’ve done so far.
Regardless I did sew it shut. Then I added the two yards of fabric to my base. I sewed one side of the fabric to the top of the T-shirt and then most of the other side to the bottom of the T-shirt. I didn’t complete this because I wanted to put eyes, mouth, and lights on the T-shirt and not on this meshy fabric.
Measuring
Next, I made Aiden standstill to cut the eyes and the mouth in the right places so he could see and breath. I also got a chance to see if his costume was too long which wasn’t.
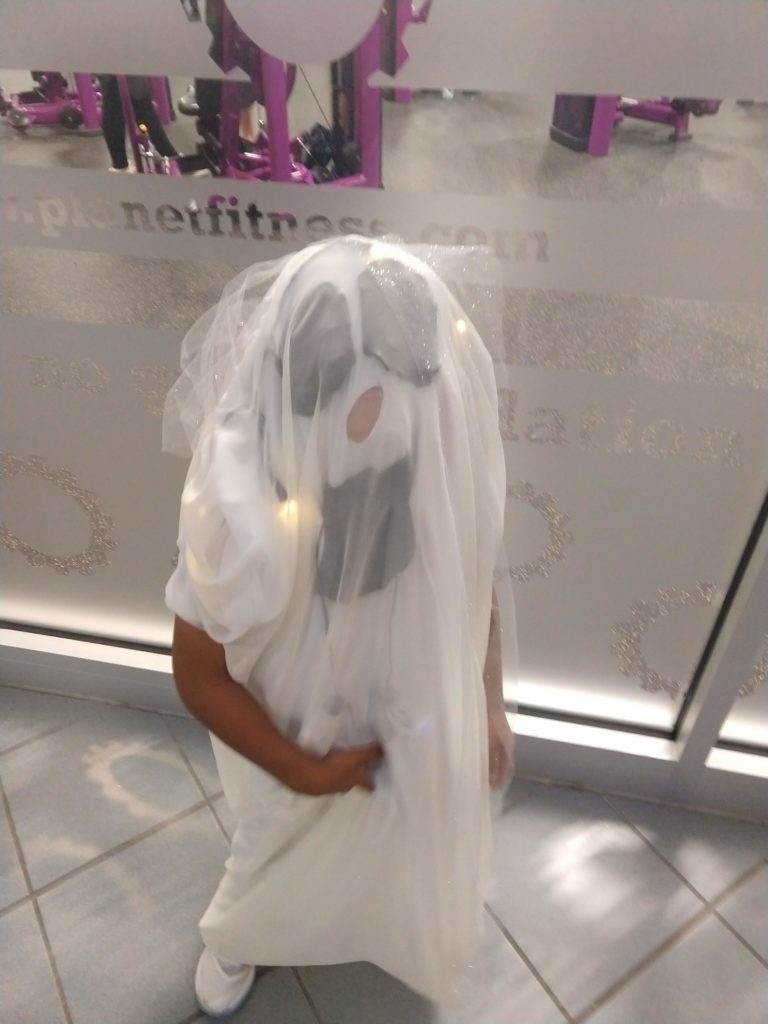
Once I had my eye and mouth hole placements I cut them in the T-shirt and cut out black mesh eyes and mouth and added them to the T-shirt. I covered the eyes but ended up leaving his mouth hole open and placing the ghost mouth lower than that.
Light It Up
After that, I added the lights to the costume. One of the three lights must have broken in the process of making the costume and I wound up to put two lights on instead. The ghost necklace lights from the dollar store went around the mouth and the long string of Christmas lights went around the top in the front and back of the costume.
At the point, I used a few Velcro dots to close up the long white mesh fabric. I did this to make it possible to get two of the lights if I need to replace the batteries if he reuses the costume or if we give it to someone else next year.
Finally, all around the top of the costume, I added long meshy streams of white and silver streamers to give a floating feel to the costume.
Adjusting the Costume

Now that he’s worn it I would change the over his head part. That is what I had to do for his most recent trick-or-treat trip.
Another thing to think about is keeping the face in place so your child can see. I saw this on Super Mom Hacks where a mom used a sheet instead of a t-shirt. You can add a light color hat where your child’s head should go. This keeps the face where it’s supposed to be.
Finally, make sure to get quality thread before you start making a costume. My son is a mover and rarely believes in being still. Add candy to the mix and what I spent hours putting together will fall apart in one missed step. I used a strong quilting thread, and his costume is holding up really well.
Related Post: Safe Trick or Treat, How to Avoid the Poison Apples
DIY Halloween Ghost Costume
Have you ever made your child’s Halloween costume? What have you made? Did you have a pattern? What are they going as this year? Let me know in the comments below.
Pin It DIY Halloween Ghost Costume
